
Steps to identifying materials reuse within a Revit project
In order to communicate with clients, engineers, quantity surveyors, builders and councils with regard to materials reuse, one method is to set up a tagging and view framework that will allow you to provide reuse-specific Schedules and colour-coded plans. Ideally, you would set this in your project Template document so it is a once-off setup task, but you can follow these instructions in any Revit project file.
Essentially, you can add to your plans views identifying
SET UP A VIEW TEMPLATE
sET UP FILTERS
Set up 4 filters to identify the nature of a component in terms of reuse.
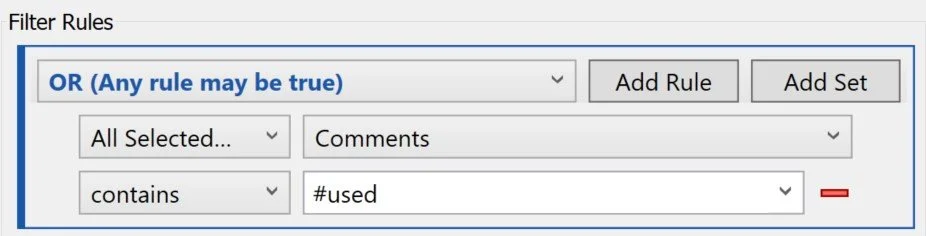
Filter One: Used Items - can be
This filter identifies components and materials that can be, according to building Standards and engineering advice, used items if desired.
Select Filters from within the View tab.
Select the icon to create a new Filter.
Name the Filter “Used items - can be”.
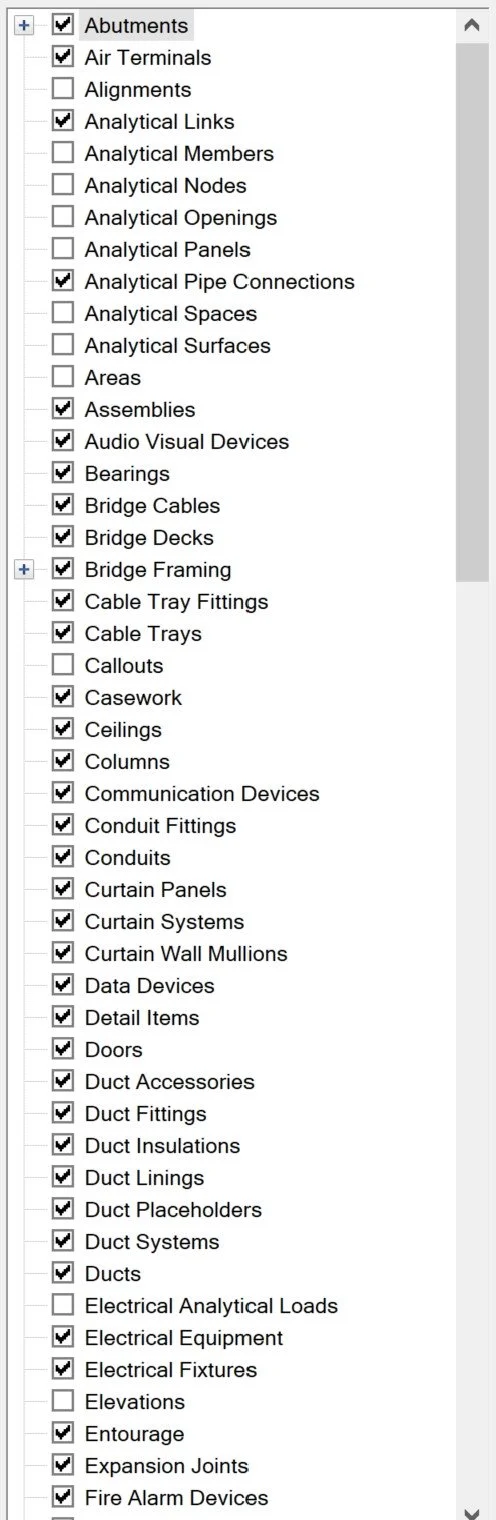
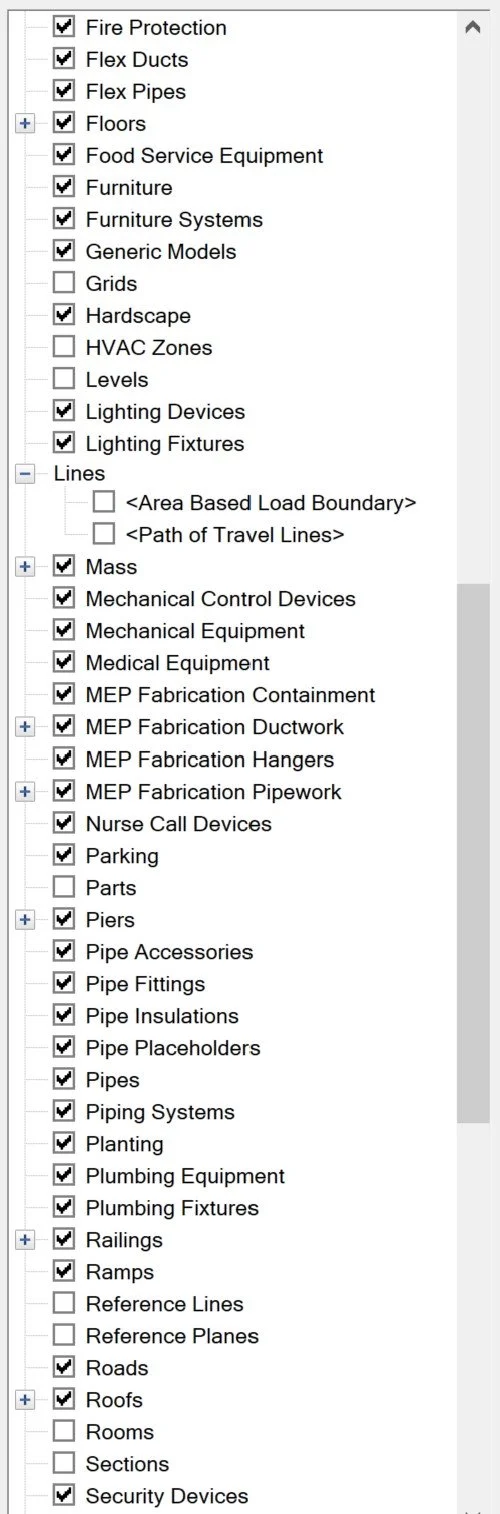
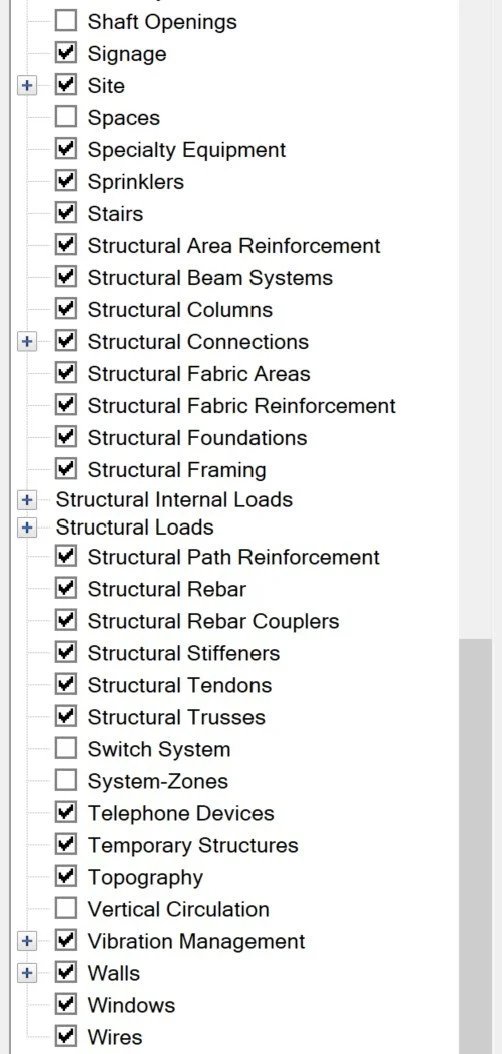
Select all the categories that contain a Comments property:
In the Filter Rules, select/write the following:
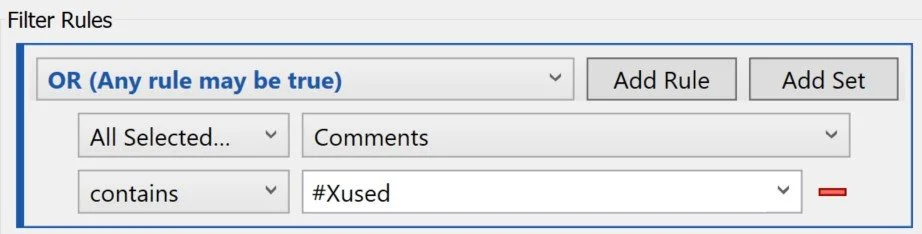
Filter Two: Used Items - cannot be
This filter identifies components and materials that must not be used componentry/materials, aka they must be new. This may be by client or engineer request, or for some other reason.
To avoid needing to re-select all the Categories, duplicate the Filter you have just created called “Used Items - can be” (right click, select Duplicate).
Rename this to “Used Items - cannot be”. In the Filter Rules, select/write the following:
Filter Three: Used Items - must be
This filter identifies components and materials that must be used componentry/materials. This may be by client request with engineering approval, or for some other reason.
Duplicate the Filter you have just created called “Used Items - cannot be” (right click, select Duplicate).
Rename this to “Used Items - must be”. In the Filter Rules, select/write the following:

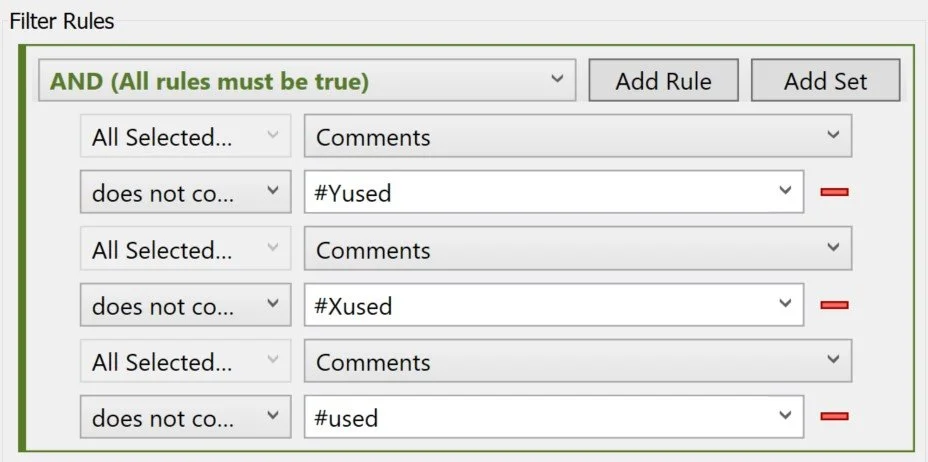
Filter Four: Used Items - not tagged
This filter identifies components and materials for which the requirement for new or used materials has not been specified. It can be helpful to identify these in case of oversight.
Duplicate the Filter you have just created called “Used Items - must be” (right click, select Duplicate).
Rename this to “Used Items - not tagged”. In the Filter Rules, select/write the following:
Set up the View Template
In the View Tab, select View Templates, select Manage View Templates. It is not possible to create a new View Template without duplicating an existing one. I duplicated the View Template “Highlight Learning Content” and renamed it “Highlight Used Components”. Regardless, create a new View Template with the following selections:
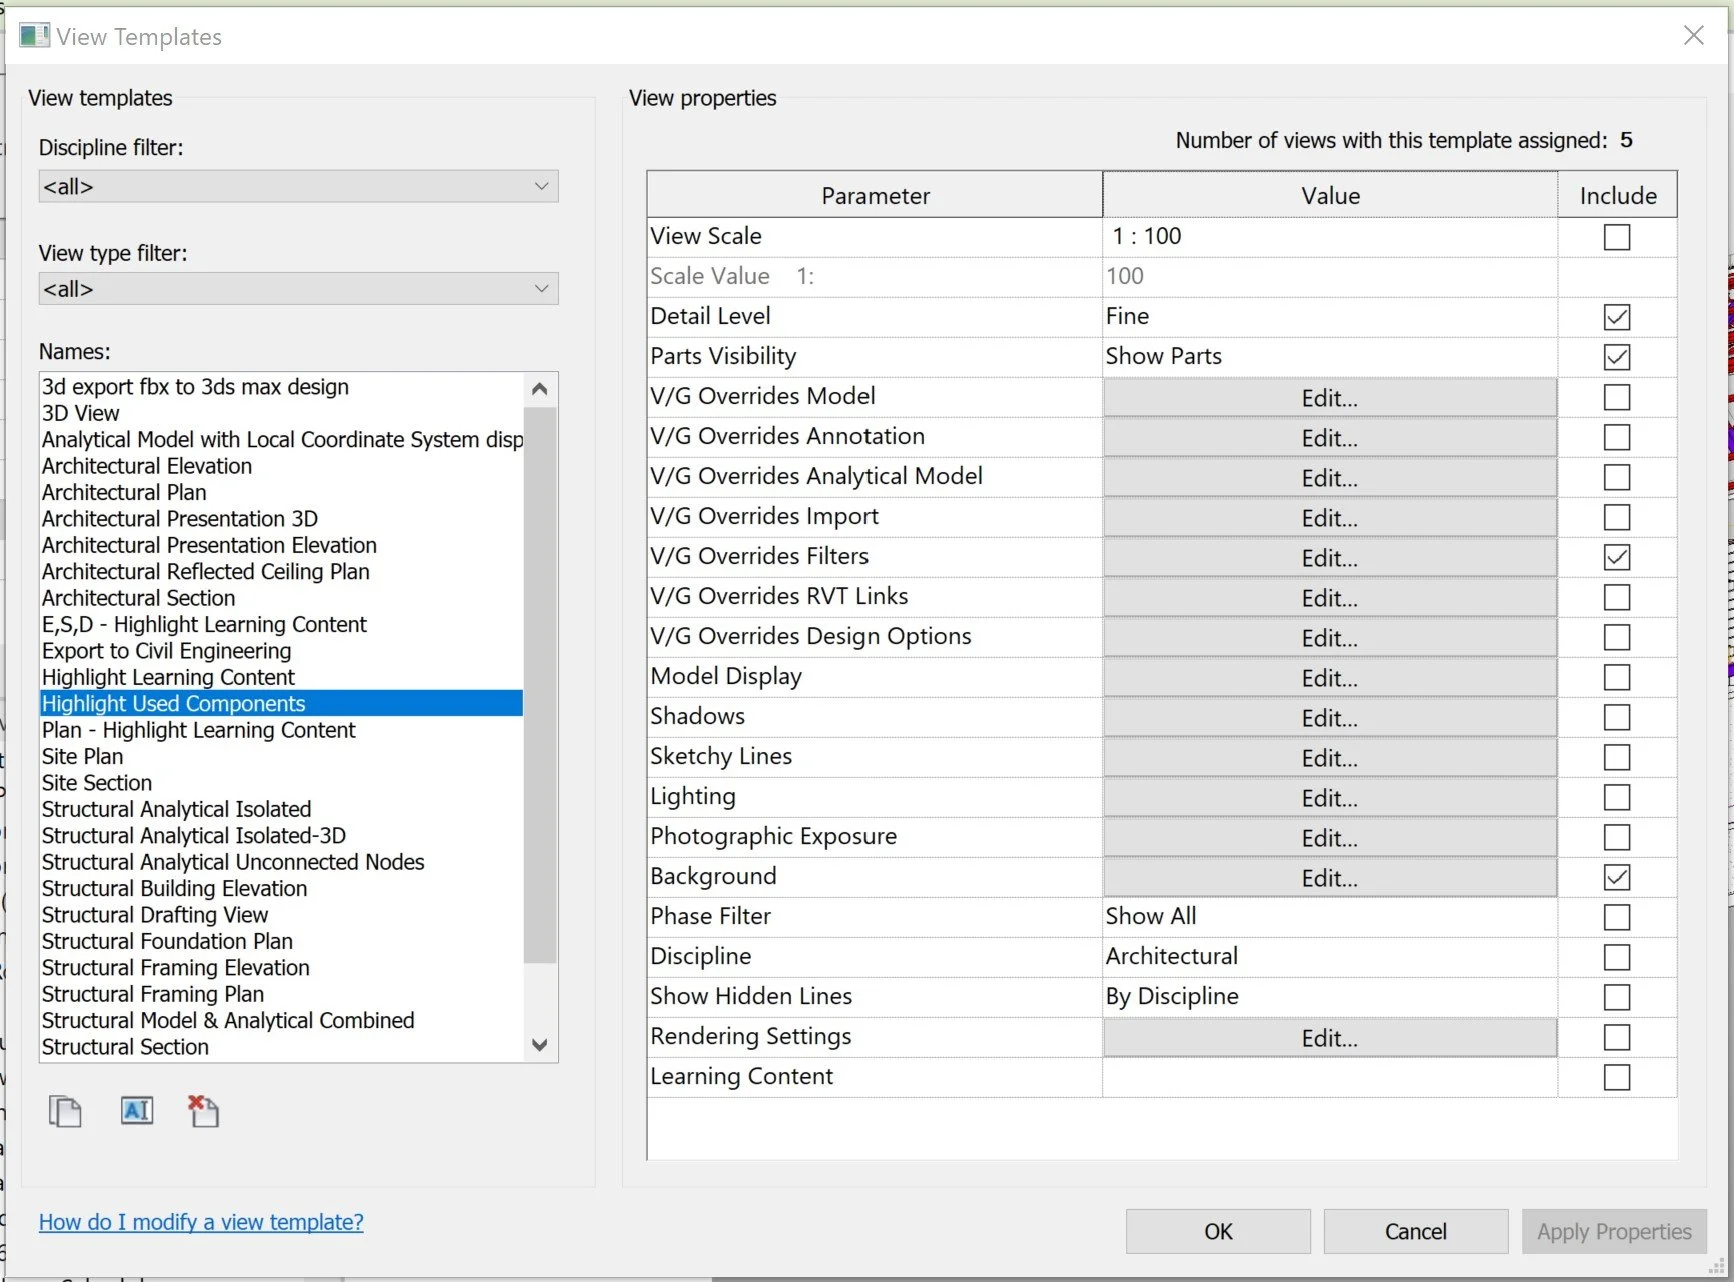
Select “Edit…” next to “V/G Overrides Filters”. Add the four Filters you just created.
For the “Used Items - not tagged” Filter, select “Override” in the Patterns column and deselect the Foreground and Background. Select OK.
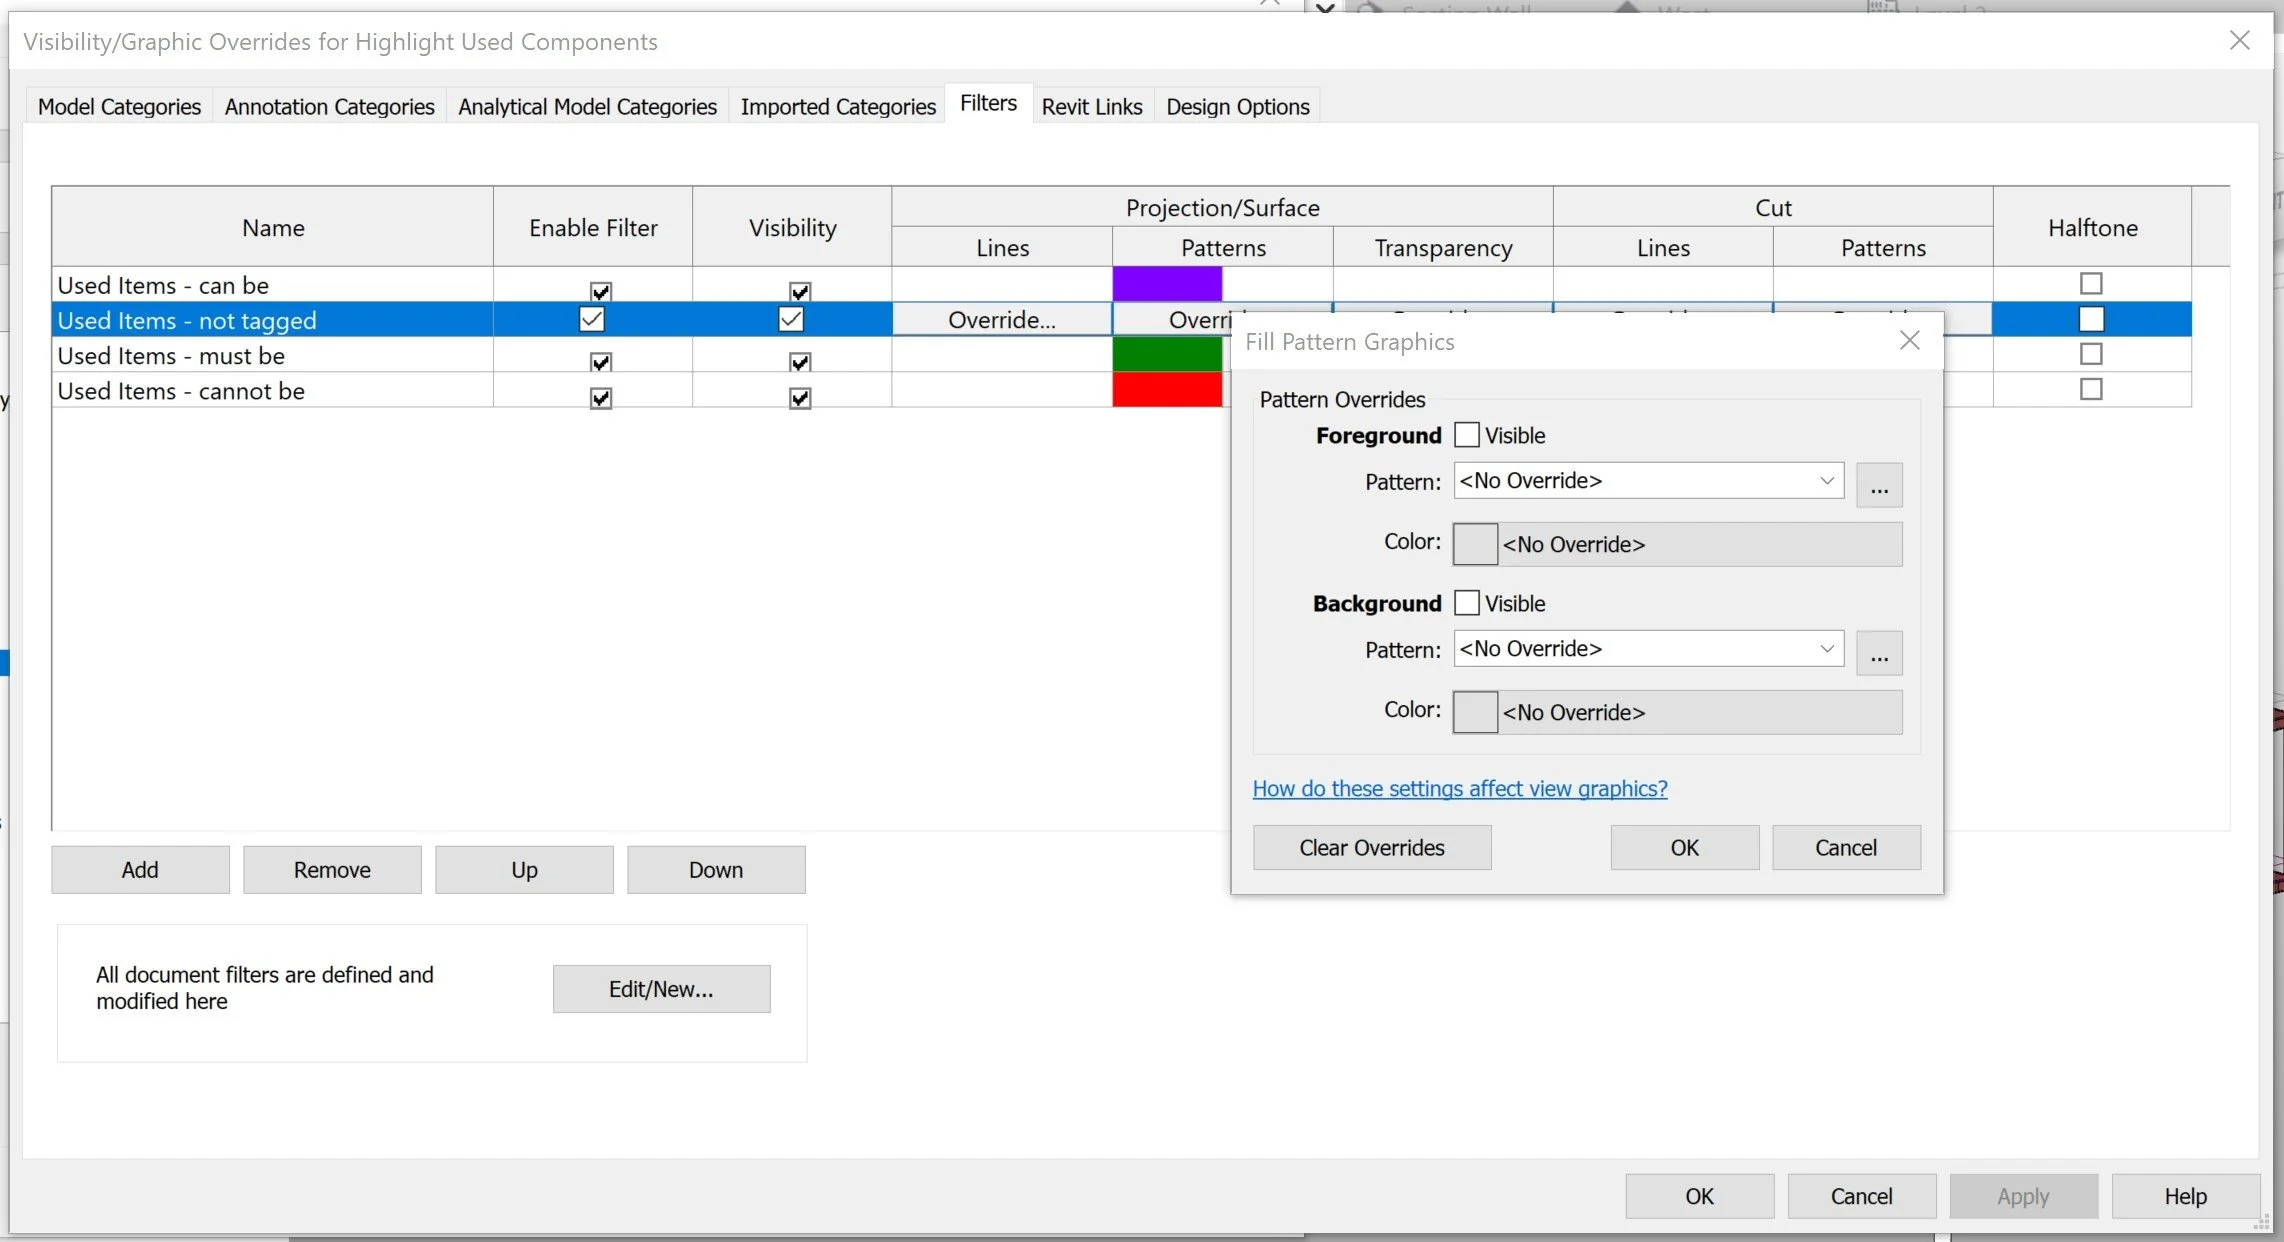
For the remaining three Filters, select “Override” on the Patterns as per below, select Solid Fill, and the corresponding colour:
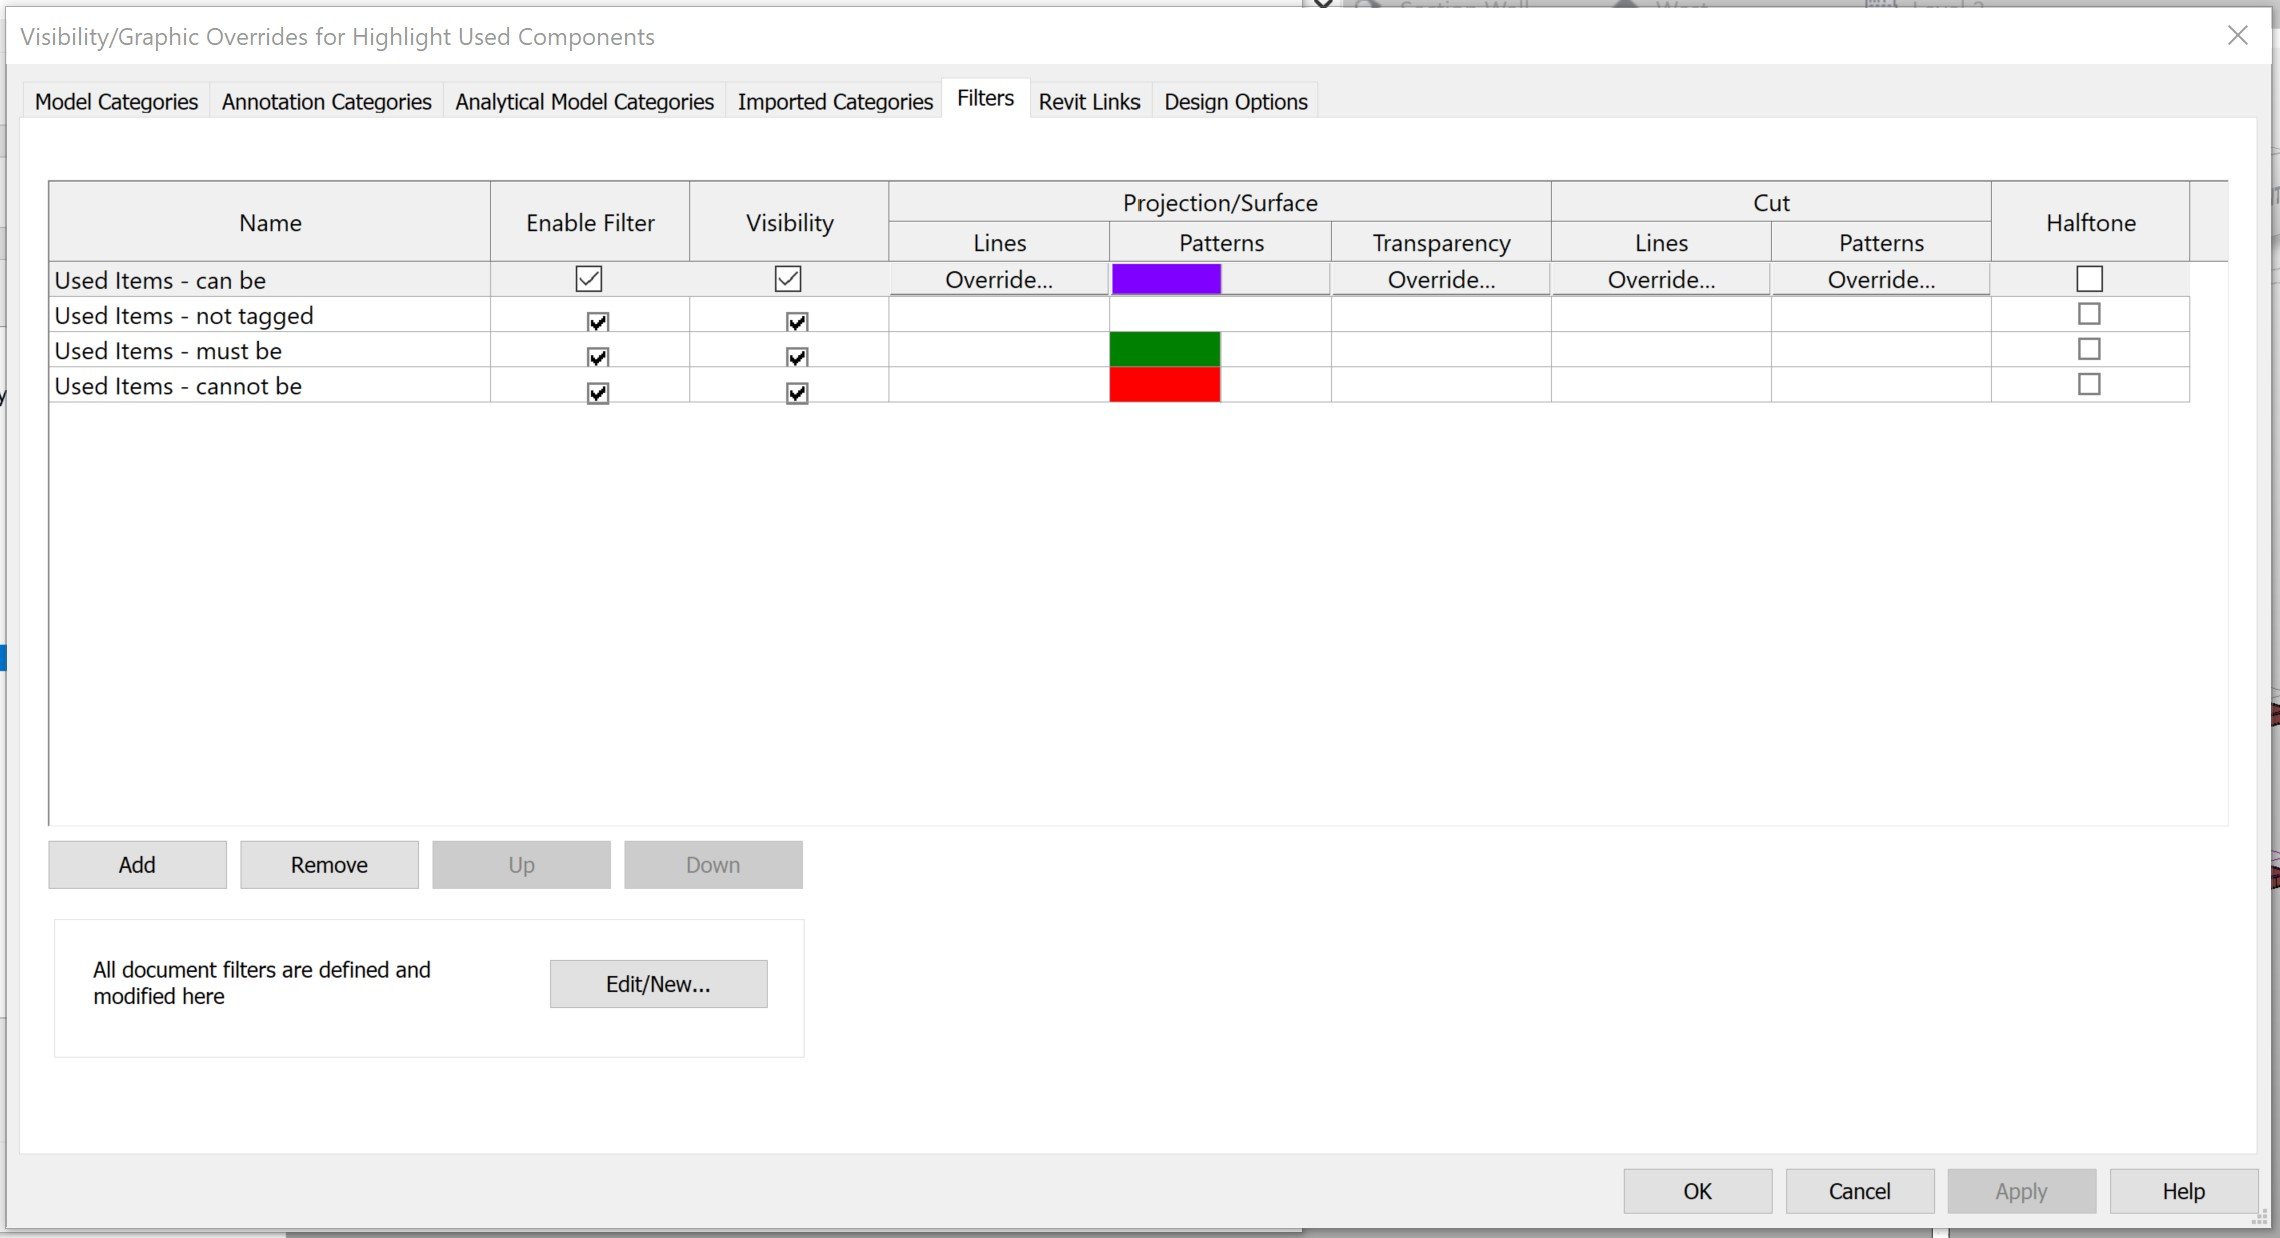
To further differentiate drawings that are for the purpose of identifying reused content, I chose to add a gradient backdground. Select “Edit…” next to “Background”, slect “Gradient” from the Background drop-down menu. If you don’t want to change the background, untick the selection box on the right of “Edit”.
Click Apply and OK
The View Template using your Filters has now been set up, but will not identify any components to recolour unless they are labelled with the hashtag:
Label Items and Materials
During Modelling
In the Properties for both objects and materials, you will find a Comments property. This is where tags related to reuse can be populated. This does not prohibit using the Comments property to make any other comments. Use the following:
#used - this comment means the item or material can be either used or new
#Xused - this comment means the item or material cannot be either used or new
#Yused - this comment means the item or material must be either used or new
no hash tag of the type listed above - components and materials that do not have a tag as per above can be identified
POST Modelling
After your model is complete, there is a further opportunity to identify or change the reuse tag of an item. This can be done by changing the individual item property. This can also be done by selecting an item, right click on the item, then click “select all instances”, either “visible in view” or “in entire project”. Once you have made your selection, you can add or remove a hastag above within the Comments property, and it will apply to all of those elements. Equally, you can select the material the items are made of, and apply one of the hashtags above to the Comments property within the Material Browser.
Generate Plans and Schedules
Generate Plans
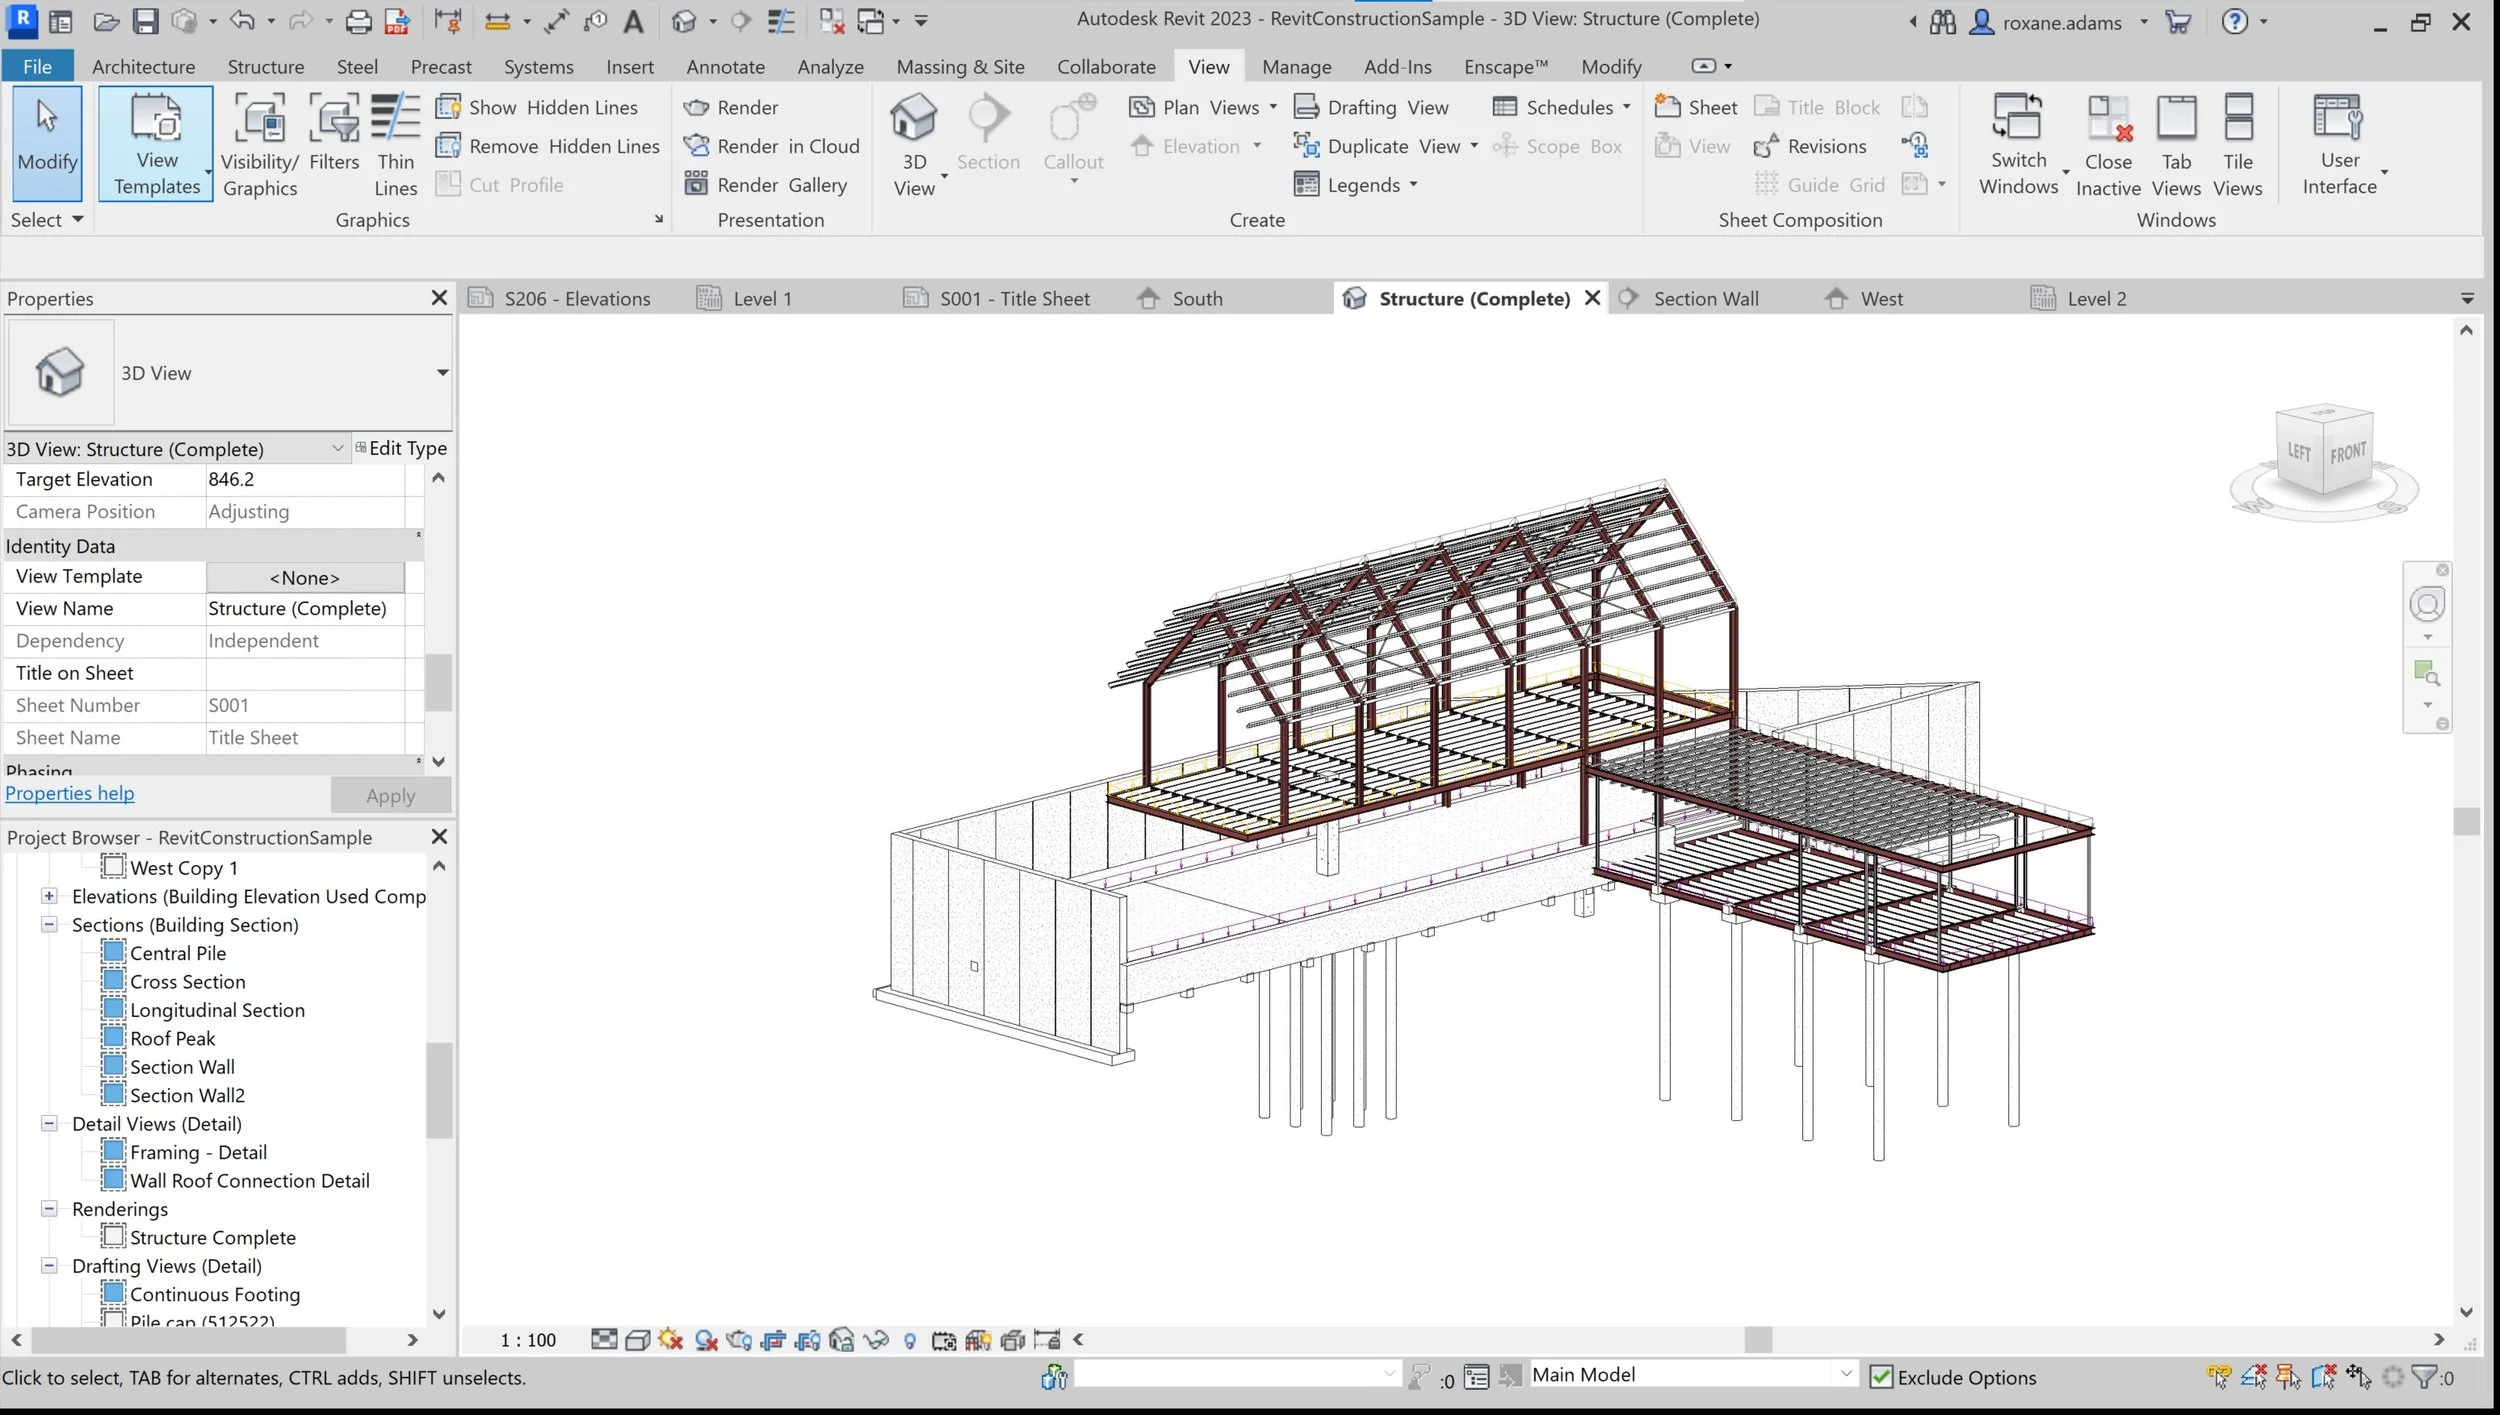
Within any view (other than a sheet view - see below), from the Properties dialog box, under Identity Data you will find “View Template”. When it is set to “None”, your model will appear with the settings you ordinarily work with, eg.:
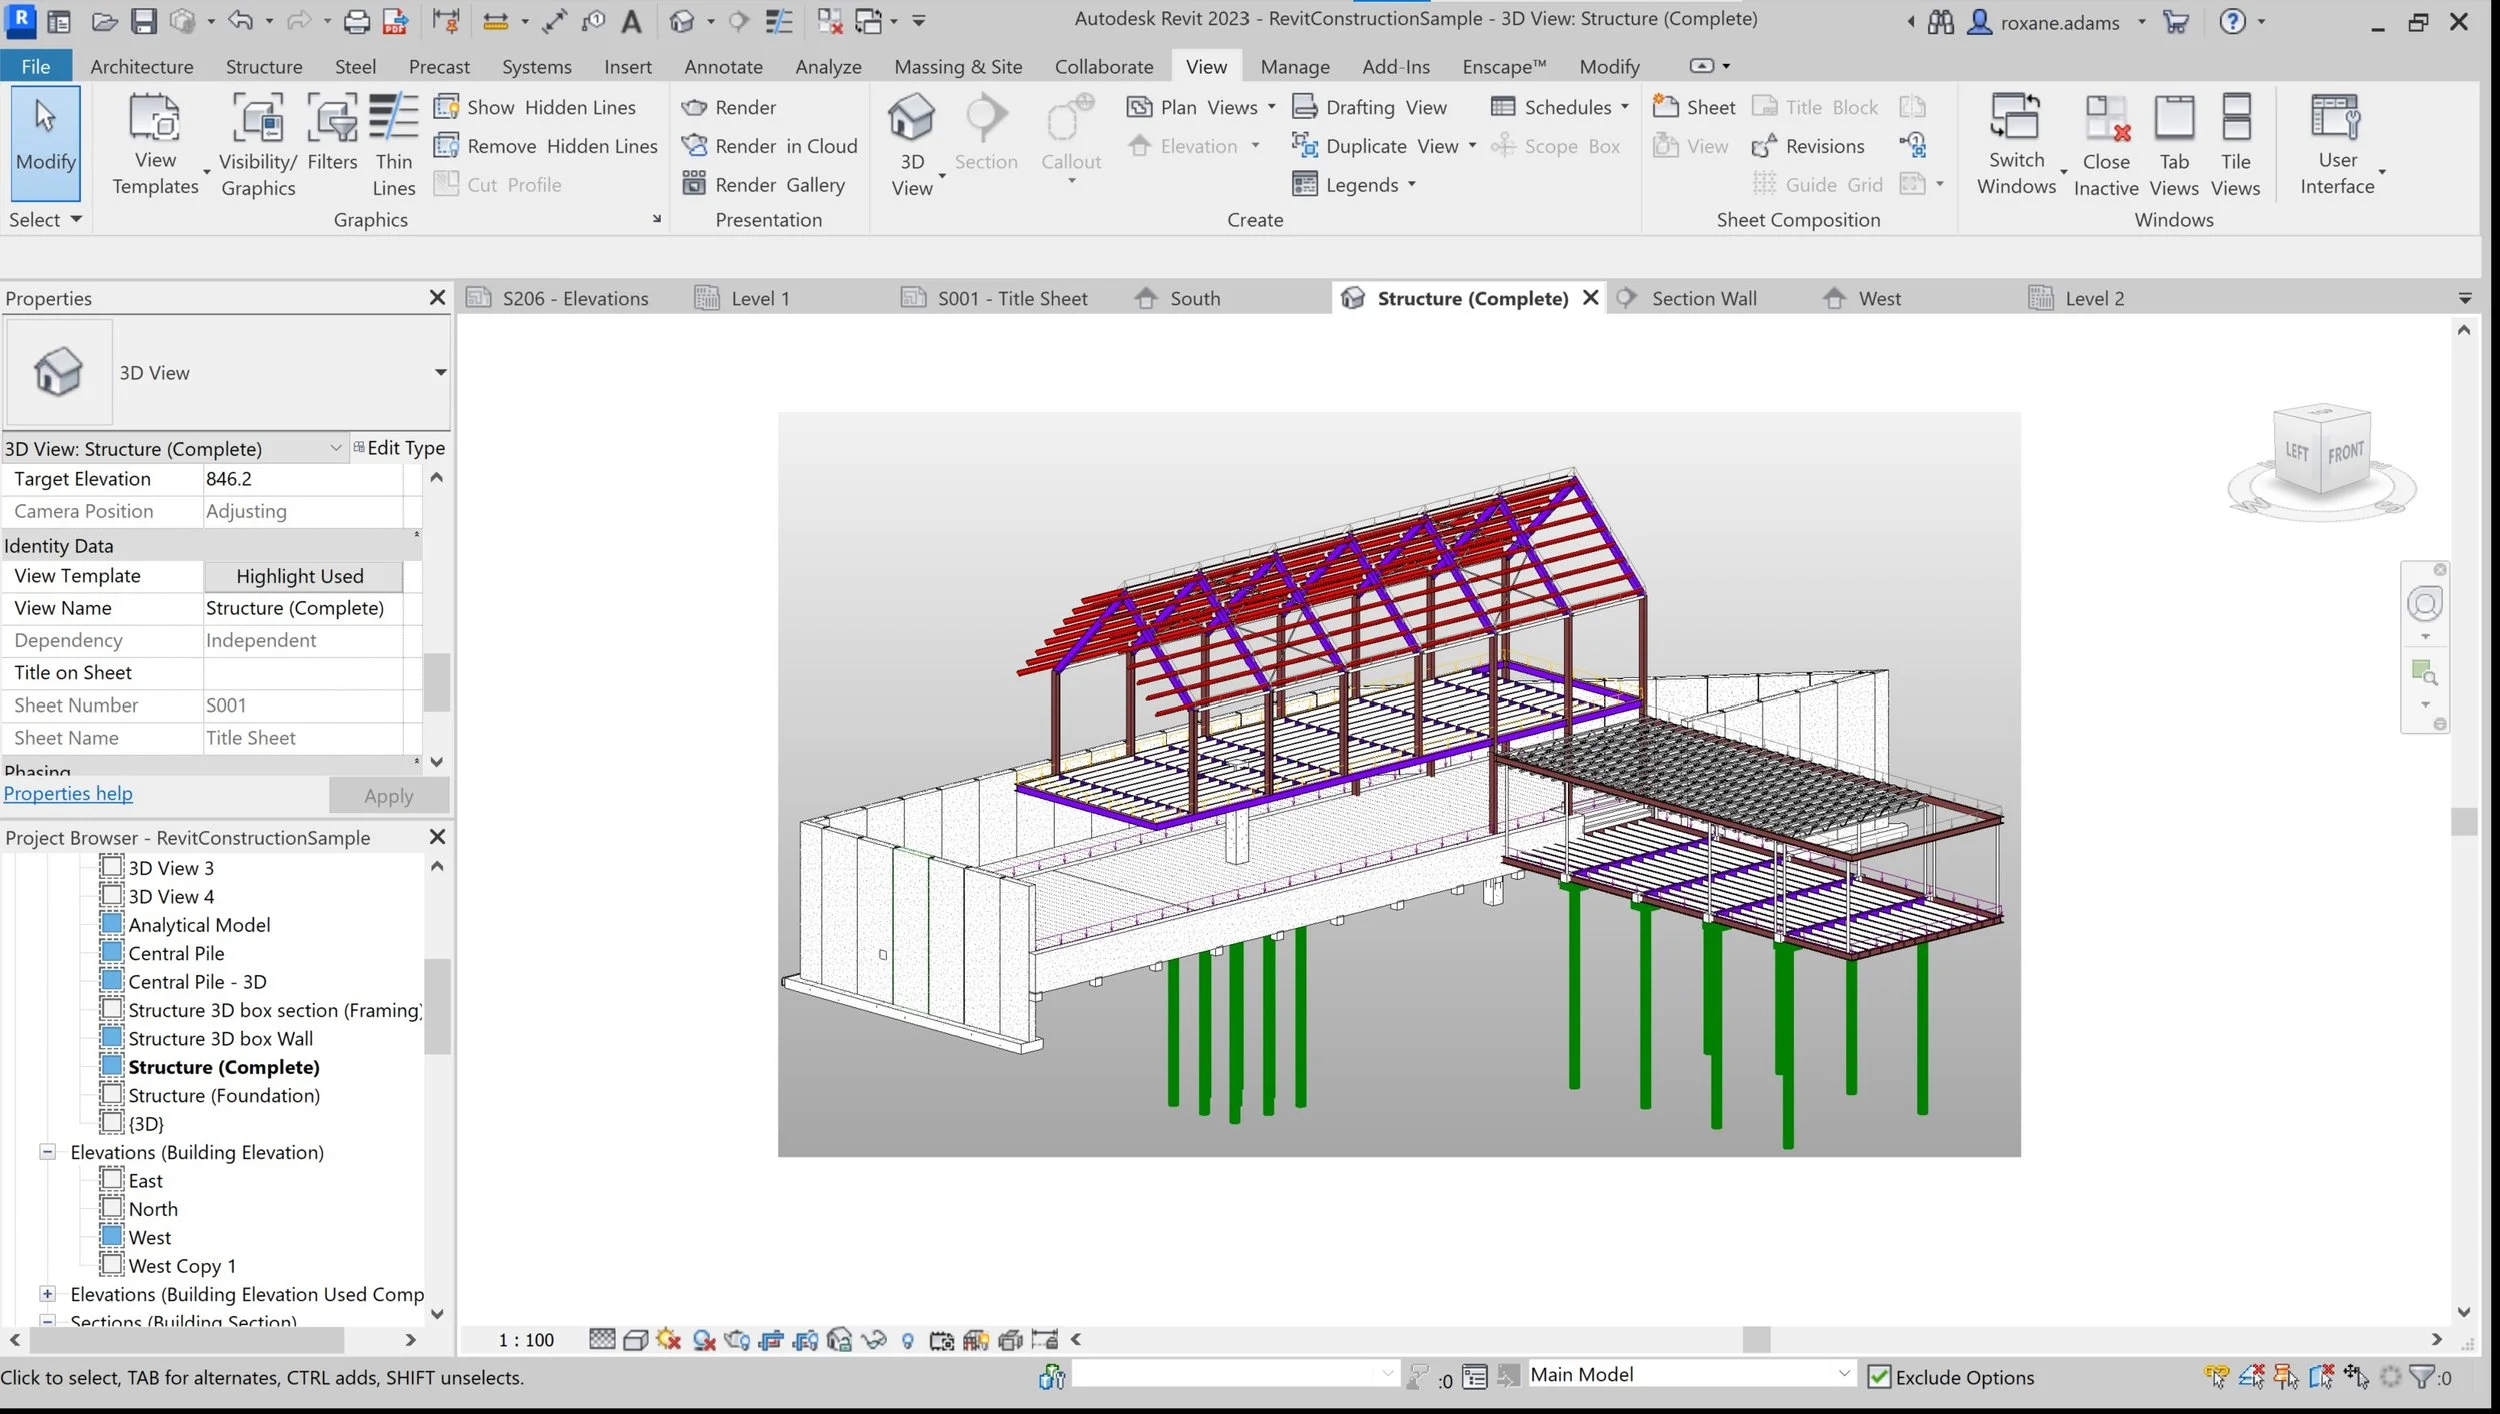
Select “Highlight Used” from the “View Template” drop-down menu, and the image will be transformed to highlight the used/new nature of your project components (red = cannot be used, purple = optional):
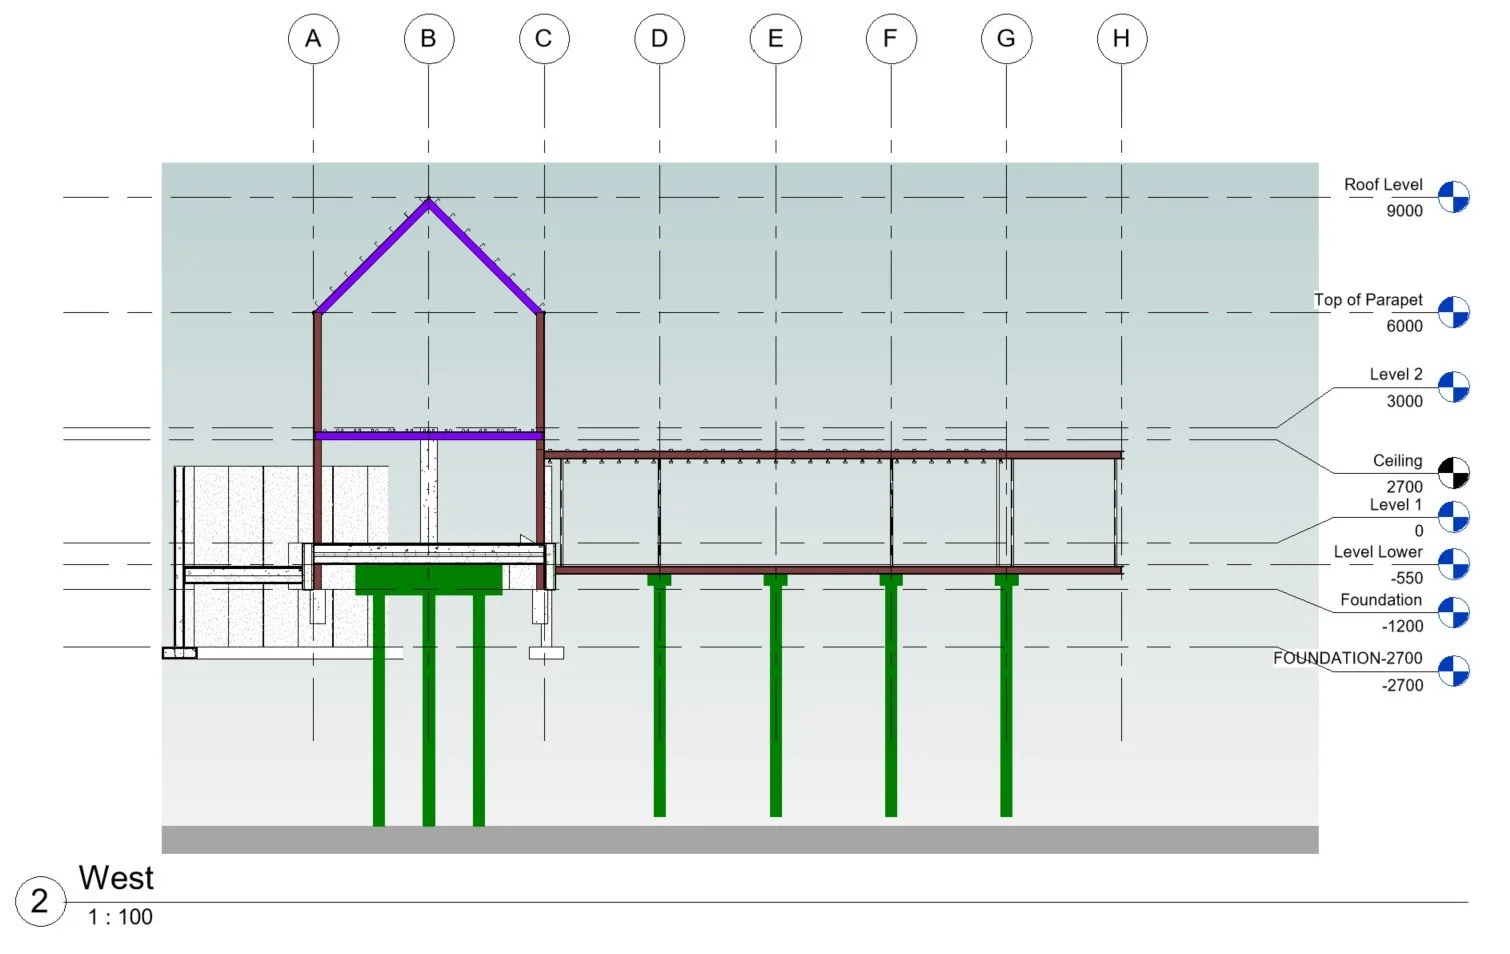
Here is an example of how the filter applies to an elevation view:
Generate Schedules
You can now generate Multi-Category Material Takeoff schedules that you can sort and filter via whether or not the item is used by including the Comments property in the Takeoff setup, as this includes the hastags that you can then sort or filter by. You can include both Comments, Material: Comments and Type Comments in this Takeoff.
Other Notes:
Sheet View
At the sheet level, applying the filters does not work. Instead, select a view you would like to apply the View Template to, then, from the Properties Dialogue box, under Identity Data, select the View Template to apply.
Materials: Recycled Content
Undert Materials, but not objects/components, there is a Property called “Recycled Content”. I would suggest also adding the hashtags here.
